Showing posts with label DIY. Show all posts

Perler Bead Star Wars Magnets | MapleSeeds Home

Tuesday, November 12, 2013

I know today is Tuesday, but I just couldn't wait to share these little guys with you! :)

The kids and I made these adorable little Star Wars characters for my sisters, for Christmas (we gave gifts early this year, when we visited them) So now I can share the pattern with your! My inspiration came from a pin on Pineterst. We also created a few more of our own characters (I think the original only had 5-6 characters). You can down load my printable chart HERE.


We hot glued some magnets to the back, aren't they the cutest little Jedis, princesses and aliens you have ever seen!!? :)


Action shot of how we made them.  The kids did most of the layout and I did the ironing. They thought it was great fun!


Don't forget to download the free printable chart from the link at the top! 


Tutorial: Giant Knitting Needles

Wednesday, November 21, 2012


Hey again!

Blogging has been a bit sparse lately, it usually is at times. We are struggling with some behavior issues and some homeschool bumps in the road. Keep us in prayer if you do!

I wanted to share the AWESOME knitting needles my husband helped me make. Sometimes I have these crazy ideas that flood my brain and this time he obliged me and went along with it, I think because it involved using power tools! :)

I have been seeing these gorgeous chunky knit blankets and scarves on Pinterest lately. I tried looking around online for some large sized knitting needles but they were kind of expensive (about $15 for just one set) and they didn't seem to make the huge sizes I was looking for. So I thought to myself, I bet I could make some! 

My husband didn't want me snapping any pictures of the "progress" because he said his methods weren't exactly safe, so here's my disclaimer... I don't recommend trying this at home, but here is how we did it!

What you'll need:
3 different sizes of wooden dowel (I used the cheapest kind at the hardware store, poplar). about $10
           (I used 5/8, 3/4, and 7/8 inch.)
I pkg of necklace clasps (the screw kind) $2.50
plastic tubing $2.50
super glue
fine sand paper (220 grit) for final sanding
40 and 120 grit sanding belts for initial sanding
belt sander (or table sander if you have one)
vice


 Hubs did the initial sanding with his belt sander clamped upside down in the vice. Like I said, not the safest method, but a farm job for sure! We cut the dowel in about 6 inch chunks and using one of my bought needles, just eyeballed the angle for the tips. The knitting tip is a lot more slanted than the tip where the yarn comes back on the needles. I wanted to make the needles adjustable so I could use them at any length so that required drilling a small hole at the "butt" end to insert on of the jewelry clasps.  Use the super glue to secure them. 

Once the general shape of the needles was made, I hand sanded them to make them really smooth. They will still be a bit tacky at first so to remedy that just rub them together and the wood smooths it self. 

Cut the appropriate amount of tubing 
(30 inch = 6+6 inches from the needles +18 inches of tube).
(24 inch = 6+6 inches from the needles +12 inches of tube).
(12 inch = 6=6 inches for from the needles + 6 inches of tube).


Glue the opposite ends of the jewelry clasps into the tubing and let it all dry! The whole thing took about 1 hour to do and cost me about $30 only because I had to buy the belts for my husbands sander. You could even make the tubing super long and make one of those beautiful chunky blankets or even knit a hammock with some rope!


Summer Pinterest Challenge!

Monday, May 28, 2012


**I've completed a few of my challenge pins! I think I'm running out of summer! :D


The running joke on Pinterest is that you spend most of your time "pinning" and less of your time actually doing all the cool things you have pinned! This summer I am putting out a challenge to actually DO some of those AWSOME ideas we've pinned on Pinterest!

If you need an invitation please feel free to message me and I can invite you to join Pinterest, also check out my boards and follow me!

So here is how the challenge is going to work:

  1. Choose 10 boards
  2. Choose 2 topics from each board to complete over the summer.
My suggestion would be to balance your projects, choose a few large ones, several medium sized ones and a few small ones. 

Here are my projects for the summer:
DIY:
  1. Dresser Re-do (inspiration1, inspiration 2). (big)
  2. DIY Bleach T-shirt (small)
PHOTOGRAPHY:
  1.  30 Day Challenge (big)
  2. Baby Bean (make or purchase) and Back drop (medium)
SEWING:
  1. Ruffle T-shirt (small)
  2. Casserole Tote (small)
FOR THE HOME:
  1. Bling my stand mixer (small)
  2. Old Window Picture Frame (small) I have just the window for this!!!
CRAFTS:


GARDEN:
  1. Seedling Starters (Medium)
  2. Stacked Flower planter (medium)
PARENTING:
  1. Chore Door Hanger (small)
  2. Devotional book (purchase) (small)
LAUNDRY ROOM:
Now not all of these are direct links to patterns, but just inspiration for the projects I want to complete this summer. I hope to blog about the projects as I complete them!

Have fun and Happy Pinning!


Knitted Finger Puppets

Thursday, May 17, 2012

Here is a cute little tutorial that I posted on Crafster several years ago. I just pulled these little guys out of my diaper bag today before I threw it in the wash. They have held up quite well and the kids love using them in the car. 

All were made with worsted weight yarn from my scrap stash. Knitted on size 3mm Double Pointed Kneedles. Cast on 15 stitches and divide btw 3 needles. Knit in the round for about 20-25 rows. Decrease row: K2tog, knit 1 K2tog. Knit 1 row. Next decrease row: K2tog, knit 1. Knit 1 row. Break yarn and draw through all sts. 

Instructions for individual animals are after each picture.
All the animals:


Zebra:

Knit 3 rows of white, 1 row black. repeat twice. FInnish in white. To make ears, pick up 2 stitches on side of head knit 3 rows, K2tog, break yarn and fasten. To make the hair, usingblack tie a row of knots and trim to desired length. Embrioder nose and eyes. For tail use 3 strands of black and braid.

Elephant:

For nose cast on 3 sts and work in I-cord until desired length. Ears cast on 5 sts work 2 rows then decrease every other row until 2 sts, break yarn and draw through.

Lion:

work in one colour, embroider face. To make the mane I tied individual strands all around the face, trim to desired lenth.

Tiger:

Knit 5 rows of orange, 2 black, repeat finishing top with orange. Ears are worked the same as zebra minus a row, in black.

Monkey:

Ears are same as tiger, tail knit in I-cord.

Mini Plant Hanger

Wednesday, May 9, 2012


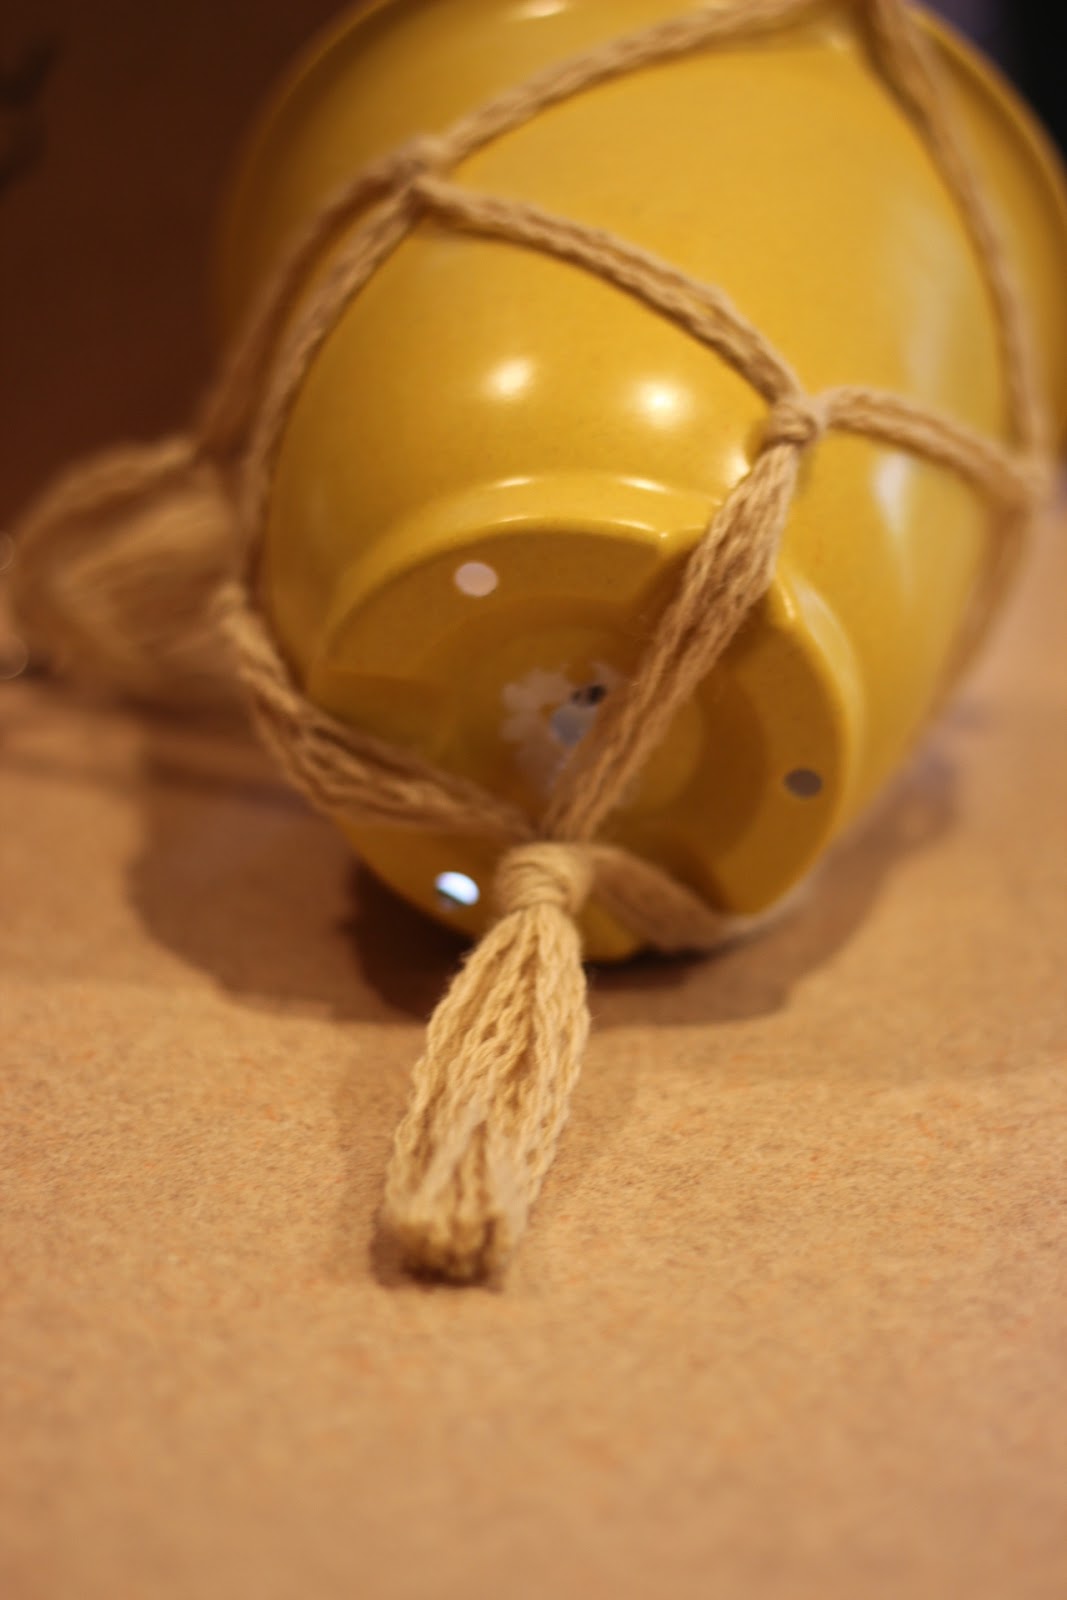
I wanted some tiny hanging pots for my little shepherds hook in my front yard. After searching at some local green houses and stores I couldn't find anything that was small enough or very colorful.

I decided to purchase some small plastic pots and make my own hangers! Check out The Skinny Laminx.com for the original inspiration.

What you'll need:
1 metal ring (circular or D rings, I just used what I had in my craft stash).
twine or string 6 40-60 inch lengths (use a more plastic type string for outside use if you want it to last a while).
1 light weight plastic flower pots.


 Here is how I did it!
Measure and but the string, fold in half and insert the loop into the ring. Then pull the ends through the loop, securing the string around the ring:


Divide the string into 3 sections (4 strands each). Where you tie you knots depends on how long you want your hanger to be. Mine is fairly short so I measured down about 9 inches and tied a knot on each section of strings:


Then divide the sections in half again and taking 2 strands from 2 sections tie another knot 3 more inches down. Do this 3 times total:
Hope this isn't getting to confusing!


Divide and tie knots 3 inches down again, then 3 more inches down tie one large knot with all the strands and trim a tassle:


And there you have your mini plant hanger! 

Clothespin Apron

Friday, May 4, 2012

*edit* Here is a great summer sewing project! I've been using this apron since last year and I LOVE IT! It makes hanging clothes on the line that much easier!

I love using my clothesline! It is frugal, it gets me outside and it is almost calming in it's own methodical way! For years I've carried my pins around in a plastic container or bucket, it's kind of a pain. We have a stationary clothesline that is 4 lines across. So I have to move my bucket with me every time I move down the line and it is a given that I drop about 10 clothespins every time! I've been wanting to make one of these aprons for a while and finally got around to it last week! Here's how I did it!

What you'll need:
  • 2 Fat Quarters (1/4 of a yard of fabric each)
  • about 1/2 yard of contrasting fabric
  • scissors
  • sewing machine
  • pins
  • thread
Fold the fat quarter in half width wise and press.


Cutting from the fold out, cut a curve along the bottom edge.


Use the first curve as a template for the second. You should have 2 identical pieces.


Out of one of the pieces cut out a hand sized piece for the pocket. Be sure to cut along the edge, not the fold!


Using the contrasting fabric, cut 2 inch strips, fold in half and press. This will be the edge for the pockets. Pin the strips with the raw edges together around the edges of the pockets, and trim.


Sew with a scant 5/8 in. seam, then press the edge outwards. Turn the edge under and pin.


Sewing close to the seam, top stitch the edging.


Do the same with the other pocket. Then lay your pocket piece on top of the other piece.  It should look like this:


Complete the edge for the outside in the same manner as the pockets.


This is what it looks like with the edge complete.


For the waist tie strap, measure a 4 inch strip out of the contrasting fabric. You will need a piece about  2 yards long, so you may need to piece strips together. I made mine pretty long  so I could wrap it around and make a pretty bow in the front.


Mark the center of the waistband and match it up with the center of the apron. Make another mark about 2 inches outside the width of the apron.


Keeping the centers matched up, unfold the waistband and pin one of the rough edges to the apron. Sew along the edge of the waistband and apron securing them together. Press the waistband up. On the wrong side fold under the raw edge of the waistband and pin. Top stitch all the way around the waistband, securing it and hiding the raw edge on the wrong side.


 Put your apron on, put some clothespins in it and run outside to hang laundry on the clothesline (try not to skip along the way!)

Fire Place Make Over!

Friday, March 9, 2012

Our house is old, and when we bought it, it was in severe need of some up-dating. Fast forward 5 years... and FINALLY we are getting around to making some changes.

After some research, and some convincing (of my husband) we decided to paint our old dingy fire place. The best instructions that we found for this DIY project were from Young House Love. If you follow their instructions you will have no trouble at all! 

I can tell you what NOT to do:

  • DO NOT use a water based paint, any leftover soot stains WILL show through!
  • Use a brush! We tried using a sprayer and there were plenty of places where the paint didn't cover. Our brick was very textured. Plus we got paint splatters all over the place!


Step 1- Wipe down your bricks with a moist (not sopping wet!) rag to remove any cobwebs or soot.
Step 2- If your bricks are especially soot stained, you’ll want to prime them with oil based primer to ensure that no soot stains bleed through your paint job. Neither of our fireplaces had this problem so we skipped right to step three.
Step 3- Use a nappy roller meant for textured surfaces to apply two to three coats of flat or semi-gloss latex paint (the finish is up to you). You also may need to rely on a paint brush to get into those deep grout crevices. Brick is an especially porous material (which explains why your fireplace may call for three coats) so be sure to have more paint on hand than you’d usually rely on for such a small surface area (our den fireplace took over a gallon of paint, and the one in our living room took nearly half a gallon).
Step 4- Do the happy dance cause you’re done. Easy, right? If you can paint a wall you can definitely paint a brick fireplace.
You can also check out the original post by clicking the link above!

BEFORE:


What not to do:


Spraying = MESS!!


Almost done, with our new paint color on the walls!


TADA!!


I love it, and it brightens up the room SO much! The total cost was about $30 for the can of paint and brushes.

Adventures in Making Maple Syrup: Part 2

Tuesday, March 6, 2012

So, to this date we have collected over 86 gallons of Maple sap! It's seriously getting out of hand! We had to clean out one of my husband  "storage" garbage cans (these hold his tree climbing and cutting gear for his business, not garbage!) to store the sap because we were running out of containers! We have probably boiled down about 30 gallons so far and our syrup is dark brown and sweet! 

First I'm going to explain how we tapped our trees. You can purchase spigots from places such as this, but they are kind of expensive if you are doing a small scale operation like we are, yes 90 gallons is small, remember it takes 40 gallons of sap to make one gallon of syrup! Plus we are cheap frugal around this house and wanted to spend as little money as possible. We decided to go with this suggestion and use plastic tubing and paraffin wax to make our spigots. 


My wonderful husband drilled the holes, we used about 1/2 inch tubing, so 1/2 inch holes. Then he drilled a screw right above the hole to hand the jugs on. We used Paraffin Wax (check the canning aisle) to seal around the tubing. Some sap will still seep down the tree but the majority of it will go through the tubing and into the jugs.  In order to seal the holes with the wax you will need to soften it first. I used and old tin can and placed the wax in the can then the can in a pot of warm water until it melted. Once it started to solidify again then it was the right consistency to rub on the holes. 


This is what our syrup looks like right now. We've strained it one and will do a final strain with some cheese cloth once we're done. 


So far we've just been boiling it on our wood stove in the house, but it's been getting warm outside and some days we don't put a fire on. We'll have to think of something a little more creative (as faster) in the near future! I don' want to be making syrup in July! :)