Summer Pinterest Challenge!

Monday, May 28, 2012


**I've completed a few of my challenge pins! I think I'm running out of summer! :D


The running joke on Pinterest is that you spend most of your time "pinning" and less of your time actually doing all the cool things you have pinned! This summer I am putting out a challenge to actually DO some of those AWSOME ideas we've pinned on Pinterest!

If you need an invitation please feel free to message me and I can invite you to join Pinterest, also check out my boards and follow me!

So here is how the challenge is going to work:

  1. Choose 10 boards
  2. Choose 2 topics from each board to complete over the summer.
My suggestion would be to balance your projects, choose a few large ones, several medium sized ones and a few small ones. 

Here are my projects for the summer:
DIY:
  1. Dresser Re-do (inspiration1, inspiration 2). (big)
  2. DIY Bleach T-shirt (small)
PHOTOGRAPHY:
  1.  30 Day Challenge (big)
  2. Baby Bean (make or purchase) and Back drop (medium)
SEWING:
  1. Ruffle T-shirt (small)
  2. Casserole Tote (small)
FOR THE HOME:
  1. Bling my stand mixer (small)
  2. Old Window Picture Frame (small) I have just the window for this!!!
CRAFTS:


GARDEN:
  1. Seedling Starters (Medium)
  2. Stacked Flower planter (medium)
PARENTING:
  1. Chore Door Hanger (small)
  2. Devotional book (purchase) (small)
LAUNDRY ROOM:
Now not all of these are direct links to patterns, but just inspiration for the projects I want to complete this summer. I hope to blog about the projects as I complete them!

Have fun and Happy Pinning!


Privacy Door Hanger

Tuesday, May 22, 2012


We live in a great neighborhood. I like all my neighbors and all of our kids play together. However, my kids are the youngest in our group of houses an they still need rests in the afternoon. Sometimes the older kids ring the door bell right in the middle of nap time!! ACK!

Here is a new idea that I am sharing with you! It's s printable door hanger that you can use to let kids know that it is play time or not! Now that school is out the kids are just raring to go!

You can print it off on an 8.5x11 piece of card stock, cut out the hole (once folded trace and cut the hole on the second side) and laminate!

I have to say this idea wasn't original to me, I saw it on Pinterest. But sadly when I went to the blog I wasn't able to print the document. Do kudos to the mom that originally thought of this!

Enjoy!

Knitted Finger Puppets

Thursday, May 17, 2012

Here is a cute little tutorial that I posted on Crafster several years ago. I just pulled these little guys out of my diaper bag today before I threw it in the wash. They have held up quite well and the kids love using them in the car. 

All were made with worsted weight yarn from my scrap stash. Knitted on size 3mm Double Pointed Kneedles. Cast on 15 stitches and divide btw 3 needles. Knit in the round for about 20-25 rows. Decrease row: K2tog, knit 1 K2tog. Knit 1 row. Next decrease row: K2tog, knit 1. Knit 1 row. Break yarn and draw through all sts. 

Instructions for individual animals are after each picture.
All the animals:


Zebra:

Knit 3 rows of white, 1 row black. repeat twice. FInnish in white. To make ears, pick up 2 stitches on side of head knit 3 rows, K2tog, break yarn and fasten. To make the hair, usingblack tie a row of knots and trim to desired length. Embrioder nose and eyes. For tail use 3 strands of black and braid.

Elephant:

For nose cast on 3 sts and work in I-cord until desired length. Ears cast on 5 sts work 2 rows then decrease every other row until 2 sts, break yarn and draw through.

Lion:

work in one colour, embroider face. To make the mane I tied individual strands all around the face, trim to desired lenth.

Tiger:

Knit 5 rows of orange, 2 black, repeat finishing top with orange. Ears are worked the same as zebra minus a row, in black.

Monkey:

Ears are same as tiger, tail knit in I-cord.

Mini Plant Hanger

Wednesday, May 9, 2012


I wanted some tiny hanging pots for my little shepherds hook in my front yard. After searching at some local green houses and stores I couldn't find anything that was small enough or very colorful.

I decided to purchase some small plastic pots and make my own hangers! Check out The Skinny Laminx.com for the original inspiration.

What you'll need:
1 metal ring (circular or D rings, I just used what I had in my craft stash).
twine or string 6 40-60 inch lengths (use a more plastic type string for outside use if you want it to last a while).
1 light weight plastic flower pots.


 Here is how I did it!
Measure and but the string, fold in half and insert the loop into the ring. Then pull the ends through the loop, securing the string around the ring:


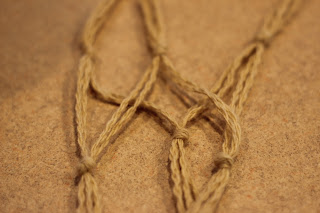
Divide the string into 3 sections (4 strands each). Where you tie you knots depends on how long you want your hanger to be. Mine is fairly short so I measured down about 9 inches and tied a knot on each section of strings:


Then divide the sections in half again and taking 2 strands from 2 sections tie another knot 3 more inches down. Do this 3 times total:
Hope this isn't getting to confusing!


Divide and tie knots 3 inches down again, then 3 more inches down tie one large knot with all the strands and trim a tassle:


And there you have your mini plant hanger! 

Clothespin Apron

Friday, May 4, 2012

*edit* Here is a great summer sewing project! I've been using this apron since last year and I LOVE IT! It makes hanging clothes on the line that much easier!

I love using my clothesline! It is frugal, it gets me outside and it is almost calming in it's own methodical way! For years I've carried my pins around in a plastic container or bucket, it's kind of a pain. We have a stationary clothesline that is 4 lines across. So I have to move my bucket with me every time I move down the line and it is a given that I drop about 10 clothespins every time! I've been wanting to make one of these aprons for a while and finally got around to it last week! Here's how I did it!

What you'll need:
  • 2 Fat Quarters (1/4 of a yard of fabric each)
  • about 1/2 yard of contrasting fabric
  • scissors
  • sewing machine
  • pins
  • thread
Fold the fat quarter in half width wise and press.


Cutting from the fold out, cut a curve along the bottom edge.


Use the first curve as a template for the second. You should have 2 identical pieces.


Out of one of the pieces cut out a hand sized piece for the pocket. Be sure to cut along the edge, not the fold!


Using the contrasting fabric, cut 2 inch strips, fold in half and press. This will be the edge for the pockets. Pin the strips with the raw edges together around the edges of the pockets, and trim.


Sew with a scant 5/8 in. seam, then press the edge outwards. Turn the edge under and pin.


Sewing close to the seam, top stitch the edging.


Do the same with the other pocket. Then lay your pocket piece on top of the other piece.  It should look like this:


Complete the edge for the outside in the same manner as the pockets.


This is what it looks like with the edge complete.


For the waist tie strap, measure a 4 inch strip out of the contrasting fabric. You will need a piece about  2 yards long, so you may need to piece strips together. I made mine pretty long  so I could wrap it around and make a pretty bow in the front.


Mark the center of the waistband and match it up with the center of the apron. Make another mark about 2 inches outside the width of the apron.


Keeping the centers matched up, unfold the waistband and pin one of the rough edges to the apron. Sew along the edge of the waistband and apron securing them together. Press the waistband up. On the wrong side fold under the raw edge of the waistband and pin. Top stitch all the way around the waistband, securing it and hiding the raw edge on the wrong side.


 Put your apron on, put some clothespins in it and run outside to hang laundry on the clothesline (try not to skip along the way!)