Fun Nativities for Kids

Friday, December 16, 2011

Do you have one of those Nativity sets that your kids are NOT allowed to touch? I do, not so much that it is expensive but that it has already been broken several times and repaired (the poor shepherd lost his foot again this year). I've always wanted to have a nativity that my kids could play with and handle, so here are some great ideas for just that!

A Printable Nativity (you can print the colored one, or the coloring book version one and let your kids decorate it themselves, thats what we did).


If you knit you could make this adorable soft knitted nativity (I'm in the midst of making this, it probably won't get finished this Christmas).


How about a gingerbread nativity!


Like Veggie Tales? There are also some pretty neat Lego and Play school plastic toy nativity sets.

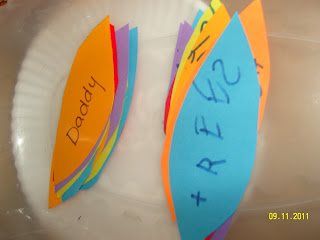
Do your kids have their own Nativity? Mine do now!

Make It Monday: Homemade Mac and Cheese!

Monday, December 12, 2011


Mac and Cheese is one of those great comfort foods, that warms your insides on a cold day! The benefits to making your own from scratch are that you can avoid the sodium and preservatives that the boxed brands have. You can also glam it up a bit by using different types of cheeses for different flavors. This recipe is the bare minimum technique for making a creamy mac and cheese sauce.

Ingredients:
1 lb macaroni (elbows or penne works)
2 cups grated cheese (sharp cheddar for traditional, you can use any flavor you like).
1/4 grated Parmesan cheese
2 c milk (whole makes it creamy)
2 T butter
2 T flour

Recipe:
Fill large pot with water and prepare pasta, to a little under done about 6-7 minutes. (*if you aren't going to bake the pasta at the end you can prepare the pasta to done, about 10 minutes).

In a small sauce pan, melt the butter over medium high heat. With a fork or whisk mix in the flour. Let this cook for about 2 minutes, this is called a roux and it will thicken your sauce.

Here is the most important part, TURN OFF THE HEAT before you stir in your milk (it will curdle... :P).  pour in two cups of milk, stirring the whole time. Turn the heat back on to medium, stirring frequently until it starts to thicken.  Once the sauce begins to thicken add the cheese and keep stirring. Once all the cheese is melted your sauce is done.

Drain the pasta and pour the sauce over. Place in a greased 13x9 inch pan. You can add more grated cheese on top, or bread crumbs for a little crunch.

Bake for about 15 minutes at 375F or until your cheese on top is brown and bubbly!

This recipe is so versatile you can add all kinds of extras to make it your own.

Ideas for extras:
  • chopped ham
  • spinach and artichokes
  • saute garlic or onions in the roux
  • Parsley, oregano, basil or your favorite herb
  • Puree veggies like carrots to add extra nutrition, add to the sauce

What We Did This Week: Space!

Friday, December 9, 2011


This week our theme was Space! I have to say it was one of the boy's favorites from the first half of the year. As usual we got some books from the library, our two favorite books were:
  • I can read about Planets, by Darrow Schecter
  • Space Shuttles, by Gregory L. Vogt
My kids are pretty young, 5 and 3 so we tried to keep it simple. We learned about planets and did some coloring worksheets from Allkidsnetwork.com, and we used a string to learn about orbit, I'll explain below!

On the day we learned about the space shuttle, we painted a picture of a rocket with sparkly stars!


Lately, instead of getting W to practice writing his ABC's I've been getting him to write out words that are part of the theme from that week. He is doing great and getting some sight learning in as well!


Check out some of these great videos from You Tube that we watched about the space shuttle! I just went to the site and typed in Space Shuttle

Here is a fun activity we did to learn about a planet's orbit!  All you need is a string and two people. One person stands still and will be the "sun" or "planted" that is being circled. The other person takes the string and holding onto the other end walks around the other person. This shows how an orbit always stays the same (for the most part).

If your kids are a little older you could make a planet mobile and experiment with a flashlight and ball to show day and night.

Have fun!

Make it Monday! Fajita Seasoning Mix

Monday, December 5, 2011

Fajita Seasoning Mix
Image courtesy of busycooks.about.com
2 teaspoons chili powder

1 teaspoon salt

1 teaspoon paprika

1/2 teaspoon onion powder

1/4 teaspoon garlic powder

1/4 teaspoon cayenne pepper

1/4 teaspoon cumin

1/2 t dried oregano (optional).

a pinch of red pepper flakes (for some heat, also optional)

If you like a really thick sauce you can add 1 T cornstarch to the mix. You can also prepare a large batch of this ahead of time. This recipe is so versatile! My friend's daughter had a food allergy to garlic when she was small, all you have to do is omit the garlic powder! You also avoid the preservatives and sodium that are in most store bought seasoning packages.

You can use it for fajitas, or as a steak rub, or even in a spicy chili!

School Magnet Board

Friday, December 2, 2011


You can thank Pinterest once again for this idea! This is our "school board".  It is a place that we can display our work for the week, without having to stick things to the wall!

I purchased an oil drip pan from a local auto parts store, it was about $10. Basically it is like a great big cookie sheet! I mounted it to the wall with some 3M Command Damage free hanging strips. They are like Velcro, one part sticks to the wall, one to the board and you Velcro it to the wall! We just grabbed some magnets that were on the fridge, but I am hoping to make some with the boy's initials on them. They think it's great and they get to show Daddy all the things they did that day when he gets home from work!


I also used my handy dandy laminator and made a dry erase sign that we could write our theme of the week on. It's mounted on the top of the board.

How do you display your kids school work??

Tom The Thankful Turkey!

Saturday, November 19, 2011

 Here is a cute Thanksgiving craft that gets your kids thinking about the things they are thankful for! Once again you can thank Pinterest for this one!

Check out Crafts for All Season's blog for the original post and instructions!

 Here are our turkey feet!

Thankful feathers. My kindergartner wrote out his thankful feathers on his own!

Do you like making seasonal crafts with your kids?

Pinterest

Monday, November 7, 2011

Have you heard about Pinterest? It is such a great resource for ideas and inspiration! It is a virtual cork board where you can "pin" pictures of of neat things you fin on the internet. The pictures link back to the original websites and others can check out the original ideas. The running joke is that most people waste so much time browsing the website and pinning that they never actually do anything that they pin! I have completed several projects from my "pins".

Here are some pins that I have completed:


Pinned Image
Pinned Image

Pinned Image

Pinned Image

And here is one I am going to use next week for school when we do our Maps theme week!!!

Pinned Image

Do you use Pinterest? Follow me, Laura MacNeil!

Make It Monday: Creamy Chicken and Peppers

Monday, October 3, 2011


I've been on a "sugar diet" during the week and the other day I wanted something to indulge in. I searched around for something I could make with the chicken I had taken out for supper. This recipe is so yummy and creamy and a great dinner indulgence.

Ingredients:
  • 3-4 boneless skinless chicken breast
  • 1 T Italian seasoning
  • 1 large onion chopped
  • 2 bell peppers (red, yellow or orange)
  • 2-3 cloves of garlic chopped
  • salt and pepper
  • 1 can diced tomatoes
  • 6-8 oz. cream cheese
  • Parmesan cheese
  • grated mozzarella for topping
  • 2 T olive oil for cooking chicken
Pre heat oven to 375F. Heat 1T olive oil in a skillet and brown the chicken on both sides, do not cook all the way through. Place chicken in a glass dish. Add 1T olive oil and saute onions, then add peppers and garlic. saute until slightly soft. Place over the chicken. In the same pan pour in the tomatoes and add cream cheese, warm until the cheese is melted. if your sauce seems a little thick add some chicken stock. Sprinkle chicken with seasoning, then pour sauce over top. Sprinkle with Parmesan cheese and mozzarella and bake for about 1 hour covered. Near the end remove covering and let cheese brown and bubble. This is great served with rice, or even over pasta, YUM!


Make It Monday (on Tuesday!): Laundry Soap

Tuesday, September 27, 2011

Here is my version of homemade laundry detergent! It's so simple and very frugal! This is the recipe that I use (it's stuck on the inside of one of my cupboards:


You can find washing soda at most smaller grocery stores, the baking soda and borax you can find at big name stores like Wal Mart.

I use any bar of soap that I can find, if you want unscented or a certain smell, choose your favorite soap! You can also customize this recipe to use a vegan soap.

Grate the bar of soap with a cheese grater. Then I put all the ingredients together in my food processor and give it a whirl!

Use 1 T per load, and store in an airtight container.

What We Did This Week: Fire Safety and Armor of God

Friday, September 23, 2011

This was our first week of doing a routine for school. We learned about fire safety this week. We used some ideas from Confessions of a Homeschooler's Fire Safety post. It was great!


Using candles, a spray bottle, a cup and a lighter we discussed what fire needs to "live". We showed what happened when you the the HEAT away by spraying the fire with water. We looked at what happens when the FUEL is gone (let the candle burn down to the bottom and it burns out). We also looked at what happens when AIR is taken away from a flame, it goes out!


The kids thought it was really neat to watch the flame extinguish when the cup was over the candle.


We also made a map of our house and talked about where all the exits were (doors and windows). We practiced a fire drill with the whole family (this is a great way to check your batteries, we noticed that one of our smoke detectors needed a new battery). We also practiced STOP, DROP and ROLL. We also got several books from the library about fire safety. We were hoping to get to the local fire department to see the trucks, but they weren't open when I called, another time.


This was the baby's newest trick this week. Crawling over then under the stool bar and getting stuck!

Our scripture for this week was Ephesians 6:13-17. I thought talking about protection in scripture was fitting for safety week! It is a bit of an abstract idea for young children so we got a little hands on! First we got a huge piece of paper (you could also do this small scale with a small outline of a person and make paper doll like clothes).

We traced each of the kids:


And let them decorate themselves:


Then everyday during the week we made and decorated each piece of the armor of God:


The SWORD of the SPIRIT, the SHIELD OF FAITH, the BREASTPLATE OF RIGHTEOUSNESS, the SHOES OF PEACE, the BELT OF TRUTH and the HELMET OF SALVATION.  


They thought it was great fun!
Today was our free day, sketch books and "school pictures" as well as a field trip to the pool!
Did you do "school" with your kids this week?

General Canning Guidelines

Wednesday, September 21, 2011

People tend to think that canning and preserving your own food is difficult, when in reality it is quite simple. Depending on what you are preserving there are a few specifics (canning fruit is different than making jam) but for the most part there are some simple rules to follow. Here is how I do it!

Tip 1: Keep it HOT!
Keeping your food, jars and lids hot prevents any bacteria from getting into your food.

Tip 2: Work in Large Batches
Although canning isn't difficult it is time consuming. Working with large batches of food makes the process quicker. Peeling, cutting and preparing is what takes the longest.

Tip 3: Use good equipment
Buying good canning jars (or inheriting them) is an investment. Also check you lids if you want t try and re-use them. Don't use rusty or dented lids because they can cause the vacuum to fail and your jar will not seal.

So here is a general overview of how I go about canning.

Gather all your equipment first, I store my caner and jars in the basement so I need to gather them up before I start. Here's the basics of what you'll need:


  • Glass jars
  • Lids
  • Large canning pot with a rack, or a pot tall enough to cover your jars (place a towel in the bottom to keep the jars from banging and breaking)
  • tongs
  • jar lifter
  • funnel with a large spout
  • butter knife
  • sharp paring knives
For canning fruit you will want to get some Produce protector.

Clean your produce, get rid of any rotten or pieces. Peel fruit or trim veggies of their stems. Fill your caner and get it on the stove while you are peeling, it takes a while for it to heat to boiling. Heat your lids in a small pot, they don't have to stay at the boiling point but you want them sterile. I heat my jars in the oven at 200F, some recipes call to boil them. When filling your jars use the wide funnel and make sure before you put the lids on, to wipe the edge of the jar so there is no juice or debris that can hinder the seal. Also before you put the lids on, run a knife inside the jar to get rid of any bubbles and then top up with whatever liquid you were using, or add more jam/jelly. Most recipes for fruit and pickles call for a "hot pack". This means that you are going to boil whatever you are preserving before you put it in the jars, just follow the recipe on this one. After you give your filled and sealed jars a water bath (boiling them in your caner or large pot for a specific amount of time) they should all "pop" and seal themselves shut. If they don't you can always put the unsealed jars in the refrigerator and use them sooner than later.

These are just general guidelines, here are some sites that you can get recipes and instructions from:

What types of foods do you want to preserve?

Recipe Collection: Southwest Veggie Dip

Monday, September 19, 2011


Recently I was enjoying some of my favourite store bought veggie dip, it was spicy it was smokey... it had chicken fat as one of the ingredients!? I almost gagged when I read through the ingredient list. How disappointing! I was craving some of that very dip yesterday, so I decided to try and make my own version of it and here it is!


Spicy Southwest Veggie Dip:

1/2 container (8 oz.) Sour cream
1-2 T mayo (this is optional, some people steer clear of mayo)
1/4 onion minced
1 T garlic Powder (use less if you don't like a strong garlic taste)
1 t Paprika
1t Cumin
1 t parsley or cilantro
1/4 t crushed red pepper flakes
salt to taste

Combine all ingredients and let rest for about 1 hour, to blend the flavours. Serve with veggies of your choice! Be careful not to lick the bowl in front of other people, because you are going to want to!


 YUM!

Crayon Rainbow

Tuesday, September 6, 2011


You might have seen these around on the Internet, I saw it first on Pinterest. We got our instructions for it from Pink and Green Mama, she's pretty crafty and great! Here's what we did!

You'll need:
  • 2-3 boxes of crayons
  • 1 large canvas
  • hot glue and glue gun
  • blow dryer


We lined up the crayons in a rainbow (ROY GBIV!) and then hot glued them to the canvas (oops that one's sideways!)

I figured taking it outside was best for clean up and messes.


This part takes the longest. Hold your blow dryer about 2-3 inches away and wait!


It's starting...

 Look at it go!!


Once it starts it really goes!


Ours is much more blended than some I've seen.


W holding the finished masterpiece!
SO much fun! They boys want to hang it in their room!